Saturday, December 29, 2012

Synology RackStation RS2212+ add RAM to 3GB

untitled

http://www.synology.com/products/spec.php?product_name=RS2212%2B&lang=us

DDR3 Memory

Available capacity :

  • 2GB

Applied models :

  • Synology DiskStation: DS1812+, DS1512+
  • Synology RackStation: RS2212+/RS2212RP+, RS812+/RS812RP+

untitled1

WP_000653

Synology RAM Module

http://www.synology.com/products/ram_module.php

Synology RackStation RS2212+/RS2212RP+


How to install the RAM?

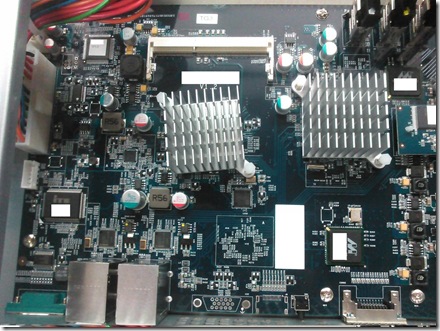
1. Open the storage case and you will see the mainboard like the following:

WP_000654

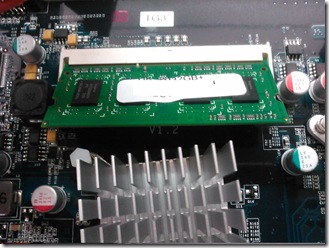
2. Install it to the slot like the following, then put it down.

WP_000655

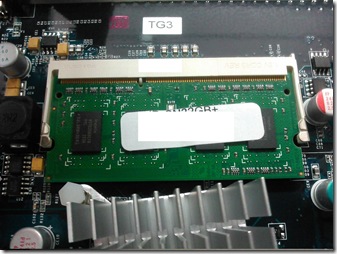
3. You will see the RAM like the following when you finish the installation:

WP_000656

For more information, please check the “Quick Installation Guide”

http://www.use-ip.co.uk/datasheets/synologyrs2212+quickinstallationguide.pdf

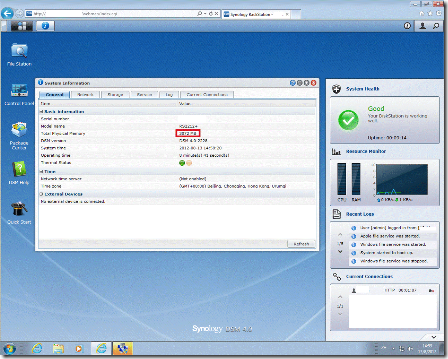
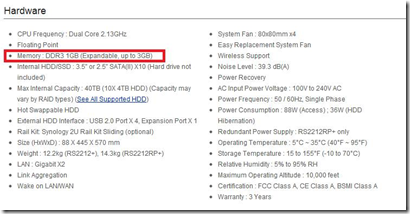
After you install the additional RAM to your Synology RS2212+, you will able to check the following result in system information:

untitled2

Print Friendly and PDF
Share/Bookmark

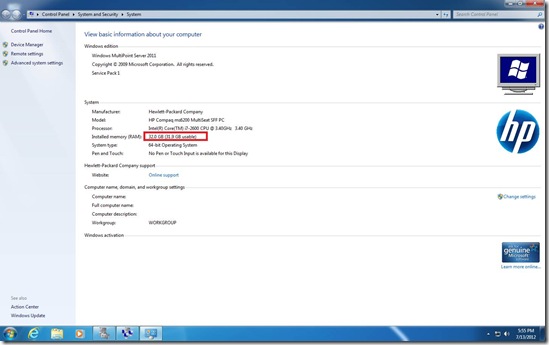
HP MultiSeat ms6200 Desktop (Running Microsoft MulitPoint Server 2011 Premium) – support up to 32GB RAM

A HP MuliSeat ms6200 Desktop able to support up to 32GB RAM (8GB x 4) if it is running a Microsoft MulitPoint Server 2011 Premium (Standard edition is only support 8GB RAM – according to MS license and edition limitation)

MS_MPS

Print Friendly and PDF
Share/Bookmark

Running iTool without install iTunes

1. Download iTune from apple.com

2. Use 7zip to extract those msi file (like the following screen) from “iTunes64Setup.exe”

image001

3. Install the “AppleApplicationSupport.msi” first and then install “AppleMobileDeviceSupport64.msi”(You must follow this order, otherwise you will get some errors) (Not necessary to install other .msi and .exe)

4. Connect your iOS device to your computer

5. Run iTools

Reference:

Download iTools

http://itools.hk/cms/webpage18.htm

免装iTunes使用iTools方法

http://www.appifan.com/jc/201206/595.html

Print Friendly and PDF
Share/Bookmark

Wednesday, December 26, 2012

Bulk edit active directory attributes tools

WiseSoft BulkModify

http://www.wisesoft.co.uk/software/passwordcontrol/bulk_modify.aspx

http://www.petri.co.il/password-control-bulk-modify-for-active-directory-windows-server-2008.htm

Bulk AD Users

http://www.wisesoft.co.uk/software/bulkadusers/default.aspx

Windows Server 2003 - ADModify Support Tool Utility

http://www.computerperformance.co.uk/w2k3/utilities/admodify.htm

http://technet.microsoft.com/en-us/library/aa996216(v=exchg.65).aspx

http://www.msexchange.org/articles/admodify-change-exchange-specific-ad-user-attributes.html Print Friendly and PDF
Share/Bookmark

Locale IDs Assigned by Microsoft

http://msdn.microsoft.com/en-us/goglobal/bb964664.aspx

Print Friendly and PDF
Share/Bookmark

Fortigate firewall add some bulid-in network monitor module to Dashboard

1. Add the “Dashboard” –> “Status”

image

2. Click “Widget”, then you will see a pop up like the following:

image

Click on the module you want to put on the dashboard.

It’s done.

Print Friendly and PDF
Share/Bookmark

How do I reset Surface RT back to factory result without logging into the system (like hard reset)

To reset your Surface without logging in, please try the following:
1. Attach your Touch Cover / Type Cover
2. Power on your Surface
3. Press and hold the Left Shift key at the Login screen
4. Press the Power icon
5. Press Restart

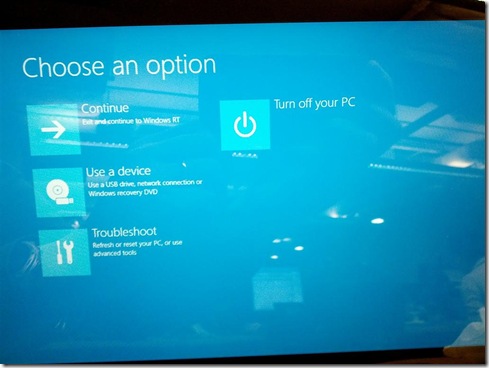
Your surface should boot to a light blue screen with some options on it.
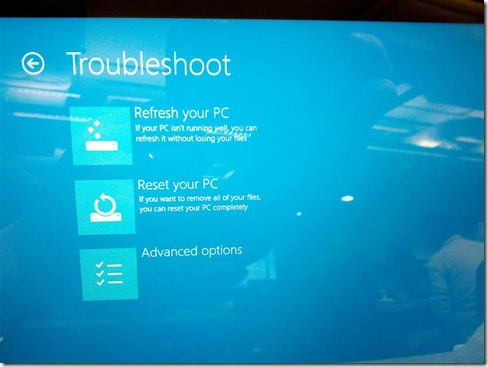
1. Click on Troubleshoot

IMG_20121203_095756 (Medium)

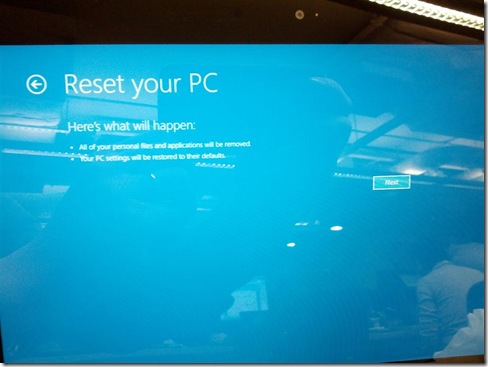
2. Click on Reset your PC

IMG_20121203_095807 (Medium)

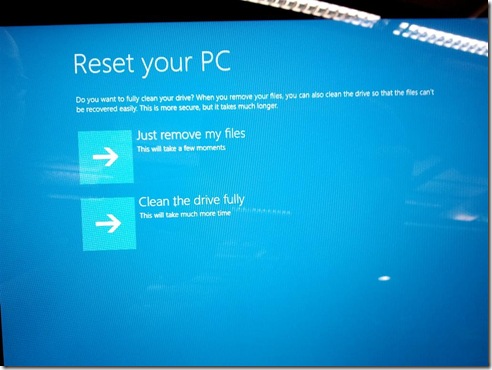
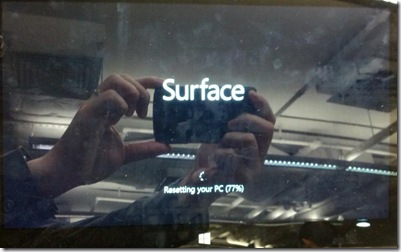
3. Follow the prompts.

IMG_20121203_095823 (Medium)

IMG_20121203_100002 (Medium)

IMG_20121203_094415 (Medium)

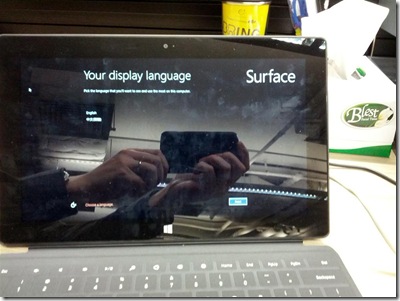
After the reset complete, you will able to start to select your display language and configuration the initate setting.

IMG_20121203_095345 (Medium) 

Reference:

http://answers.microsoft.com/en-us/surface/forum/surfwinrt-surfupdate/how-do-i-reset-surface-rt-back-to-factory-result/92bcce88-5fc3-4e5f-8160-741d12a7c701 Print Friendly and PDF
Share/Bookmark

Network and Server management livecd or Virtual appliance

LiveCD

1. Fully Automated Nagios (Server monitoring)

http://www.fullyautomatednagios.org/

2. Cacti (Network monitoring)

http://www.cactifans.org/

Virtual appliance

1. OCS Inventory NG Server (Software deployment and inventory)

http://www.ocsinventory-ng.org/en/download/download-server.html

(Use VMware Standalone Converter to upload it to your VMware ESXi.)

Print Friendly and PDF
Share/Bookmark

VMware ESXi 5.1 upgrade to 5.1a

1. Upload the patch “ESXi510-201210001.zip” to the ESXi datastore via vSphere client

http://kb.vmware.com/selfservice/documentLinkInt.do?micrositeID=&popup=true&languageId=&externalID=2034548 

2. Put all VM shutdown

3. Put the ESXi to enter the maintenance mode

4. Use SSH to connect to the ESXi host and run the following command:

esxcli software vib update -d /vmfs/volumes/[DATASTORE]/[PATCH_FILE].zip

e.g. esxcli software vib update -d /vmfs/volumes/DATASTORE1/ESXi510-201210001.zip

Remark: You must put the absolute path of the patch .zip file (e.g. /vmfs/volumes/……./.zip), otherwise you will receive a error like the following:

[MetadataDownloadError]
Could not download from depot at zip:/var/log/vmware/ESXi510-201210001.zip?index.xml, skipping ((‘zip:/var/log/vmware/ESXi510-201210001.zip?index.xml’, ”, “Error extracting index.xml from /var/log/vmware/ESXi510-201210001.zip: [Errno 2] No such file or directory: ‘/var/log/vmware/ESXi510-201210001.zip’”))
url = zip:/var/log/vmware/ESXi510-201210001.zip?index.xml
Please refer to the log file for more details.

5. Once the upgrade is completed, reboot the ESXi host.

6. After the reboot complete, you will see the ESXi bulid number become “Build 880471”

7. Exit the maintenance mode and power on those VM.

Reference:

http://www.sotechdesign.com.au/esxcli-updatepatch-produces-could-not-download-from-depot-error/

http://tinkertry.com/patchesxi50/

Print Friendly and PDF
Share/Bookmark

How to use Linksys RT31P2 to connect Comnet phone

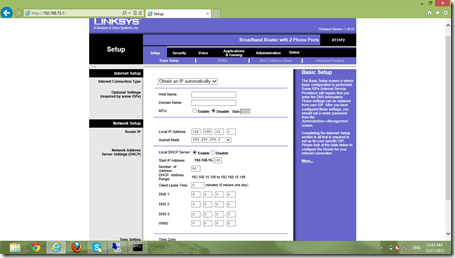
1. Login the RT31P2 via IE

Linksys1

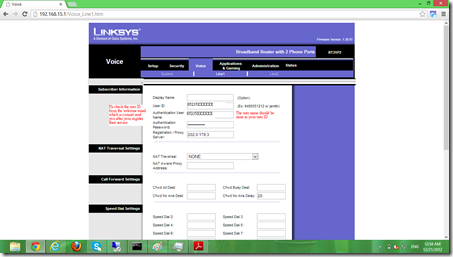
2. Go to “Voice” and “Line 1”, then enter the following information:

   i. User ID

  ii. Authenication User Name

iii. Authenication Password

iv. Registration/Proxy Server

Linksys2

The ATA gateway basic setup is complete, connect your analog phone to line one and make sure your RT31P2 is able to connect to Internet.

You will able to use your phone to make/receive phone call now.

Print Friendly and PDF
Share/Bookmark