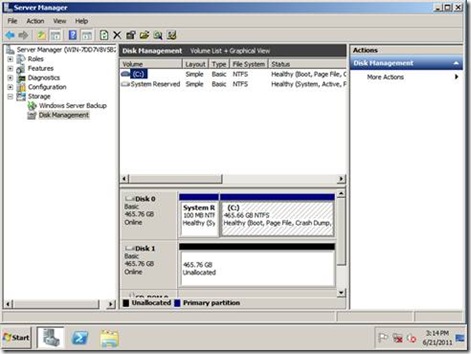
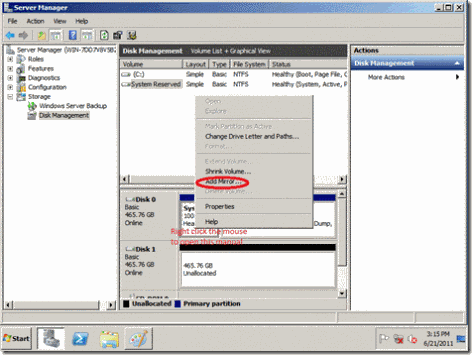
(For your reference only, I only try in a VM one time to do the “remove mirror” and “break mirror”).
Remove mirror will also remove all the data on the designated mirror disk. (Disk A will keep current data, but Disk B will remove all the data and volume)
Break mirror will stop the mirroring of the volume, but it will keep the data in both disk. (Disk A and Disk B which creates two separate and independent volumes containing identical data)

Please do not try the “Remove mirror” or “Break mirror” in your production system unless you have full data backup and well prepare disaster recovery of your system. (Take your own risk)


![clip_image002[5] clip_image002[5]](http://lh3.ggpht.com/-5I60zrZgjK8/T9Rj8F3CnpI/AAAAAAAAAUw/fmBr_4Yn-8g/clip_image002%25255B5%25255D_thumb%25255B2%25255D.jpg?imgmax=800)

![clip_image002[7] clip_image002[7]](http://lh4.ggpht.com/-gfvALBQvua8/T9Rj_9hsvoI/AAAAAAAAAVM/xBcvNgDyIXo/clip_image002%25255B7%25255D_thumb%25255B1%25255D.jpg?imgmax=800)
![clip_image002[9] clip_image002[9]](http://lh3.ggpht.com/-3_OlK3tyyiw/T9RkBqw0zOI/AAAAAAAAAVg/MyBr4t7b7C0/clip_image002%25255B9%25255D_thumb%25255B1%25255D.jpg?imgmax=800)
![clip_image002[11] clip_image002[11]](http://lh5.ggpht.com/-u3gK8uxhlCc/T9RkDVrHUdI/AAAAAAAAAVw/MdB_4pNj0Xo/clip_image002%25255B11%25255D_thumb%25255B1%25255D.jpg?imgmax=800)
![clip_image002[13] clip_image002[13]](http://lh3.ggpht.com/-dNd8ypf9ATM/T9RkFxHT4gI/AAAAAAAAAV8/befiwSqOB8o/clip_image002%25255B13%25255D_thumb%25255B1%25255D.jpg?imgmax=800)
![clip_image002[15] clip_image002[15]](http://lh4.ggpht.com/-63ACCT8jpVY/T9RkH794uiI/AAAAAAAAAWM/xIeXfBSQBN8/clip_image002%25255B15%25255D_thumb%25255B1%25255D.jpg?imgmax=800)
![clip_image002[17] clip_image002[17]](http://lh4.ggpht.com/-xcmDPi3ADUo/T9RkKXRCuoI/AAAAAAAAAWc/QHx4rks8064/clip_image002%25255B17%25255D_thumb%25255B3%25255D.jpg?imgmax=800)
![clip_image002[19] clip_image002[19]](http://lh5.ggpht.com/-zCc39EYRZf8/T9RkMNvgQmI/AAAAAAAAAWw/xRBErcNil-4/clip_image002%25255B19%25255D_thumb%25255B1%25255D.jpg?imgmax=800)